
 Technical Guide by Kody Kendall
How to Set Up OpenClaw on AWS EC2 from Scratch
Setting up your own AI agent shouldn't feel like rocket science. Follow this 18-step guide to get your OpenClaw instance running on AWS in under 30 minutes.
If you have been following the AI agent space, you have likely heard of OpenClaw. It is a powerful, open-source tool that lets you run an agent with full system access through familiar interfaces like Telegram or WhatsApp.

However, for many business operators, the technical barrier of setting up a cloud server can be daunting. This guide is designed to bridge that gap. We will walk through every single click and command needed to move your agent from idea to execution on a dedicated AWS EC2 instance.
Why AWS EC2?
Running OpenClaw on your personal laptop is fine for testing, but a business-grade agent needs to be always on. AWS EC2 provides the reliability and static IP addresses required for a professional setup.
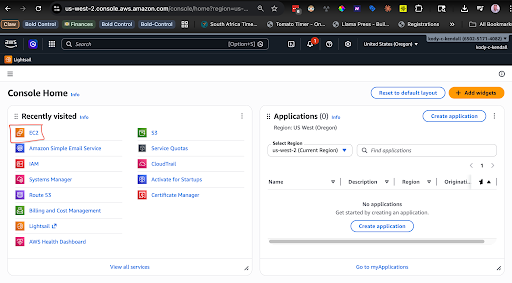
AWS Console & EC2 Dashboard
1. Register for a new AWS account, or sign into your existing one.
2. Sign into your AWS Cloud Console Home.
3. Find and Click on the “EC2” dashboard link (search “EC2” in the top search bar, if it doesn’t appear on the Console Home page).
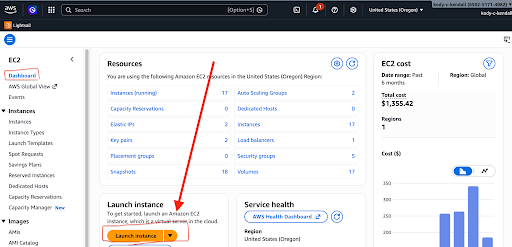
Launch Instance & Naming
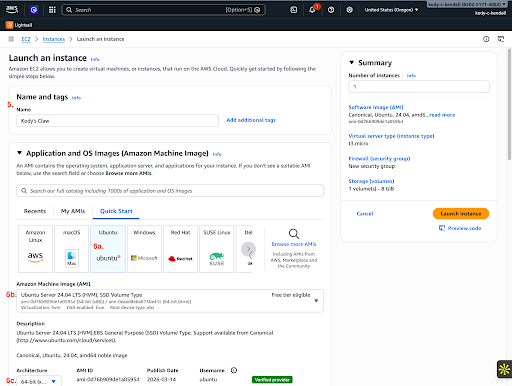
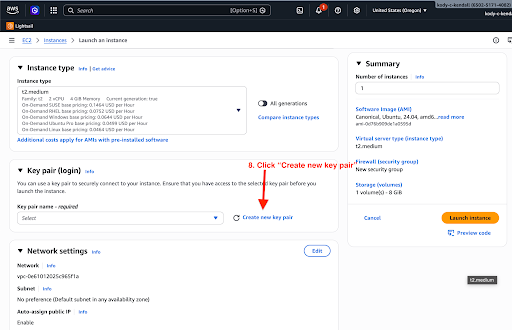
4. In the EC2 Dashboard, click on “Launch Instance”.
5. Under “Name and tags”, type your Claw’s name. E.g., “Kody’s Claw”.
OS Selection: Ubuntu 24.04
Under the “Application and OS Images (Amazon Machine Image):
- Select Ubuntu.
- Make sure it’s Ubuntu Server 24.04.
- Leave the Architecture to 64-bit (x86).
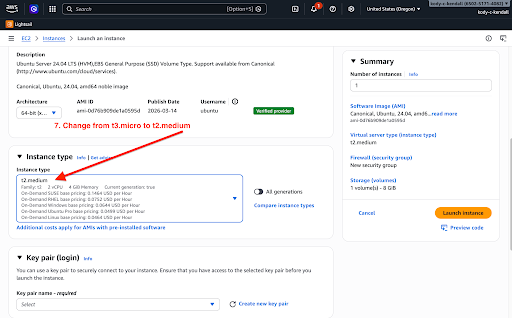
Instance Type: t2.medium
Under “Instance type”, change from t3.micro to t2.medium.
T2 medium has 4GB RAM and 2vCPUs, which is the bare minimum needed for a smooth OpenClaw experience without constant crashes.
Key Pair (Login)
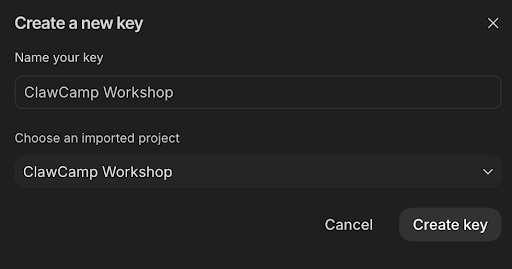
8. Under “Key pair (login)” click “create new key pair”.
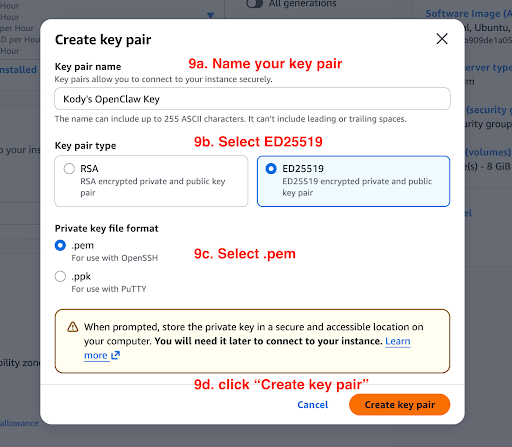
9. In the create key pair popup modal:
- Name your key pair.
- Select ED25519.
- Select .pem.
- Click “Create key pair”.
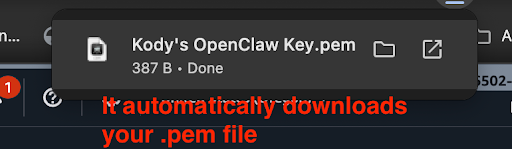
Download PEM File
Your browser should automatically download your .pem file. Keep this safe; it is the only way to access your server.
Storage & Launch
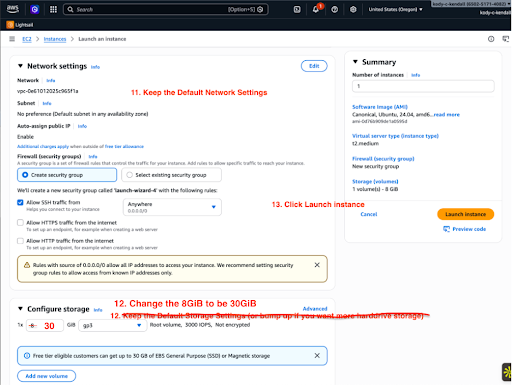
11. Keep your VPC network settings the exact same.
12. ⚠️ Bump the 8GB Up to 30GB! OpenClaw generates a lot of logs, and you’ll want space on your device.
13. Click “Launch Instance”.
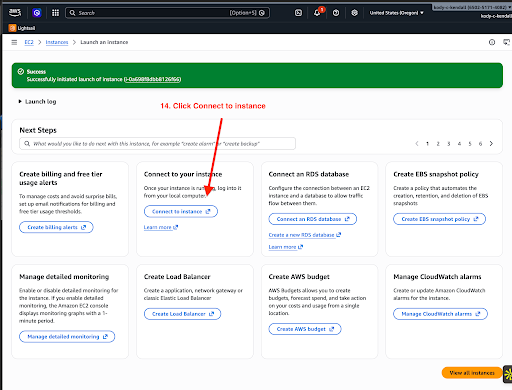
Connect to Instance
14. After successful launch, click “Connect to your instance”.
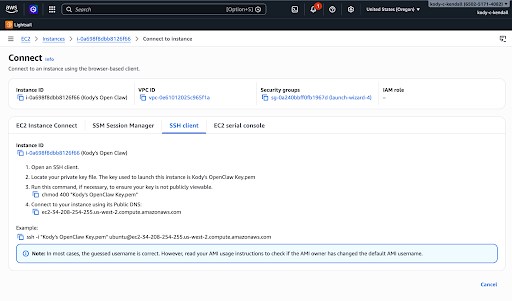
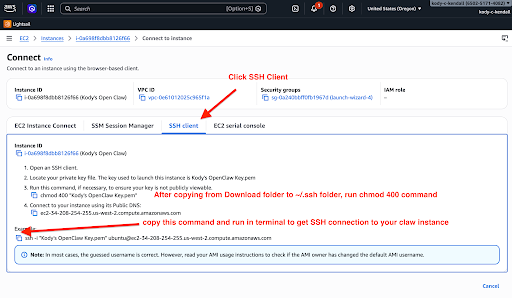
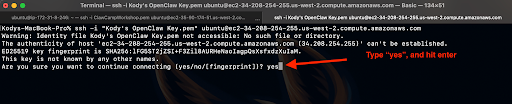
15. Now, you must use your terminal to SSH into your Ubuntu instance. You will use the SSH information provided by AWS.
Terminal Configuration & Installation
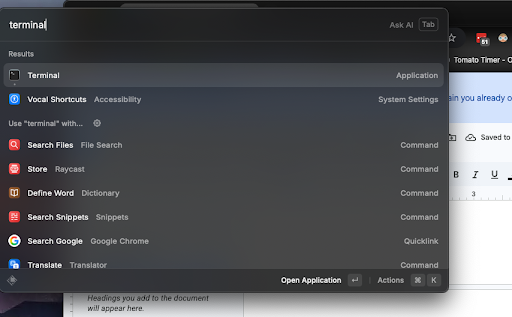
On your Mac, click Command + Space and search for “terminal” to open it.
Move the PEM key to your .ssh folder and change directory:
$ cd ~/.ssh

Set the correct permissions for the key file:

Copy the SSH command from your AWS dashboard and paste it into your terminal to begin the connection process.
When prompted to continue connecting, type 'yes' and press Enter to add the host to your known hosts file.
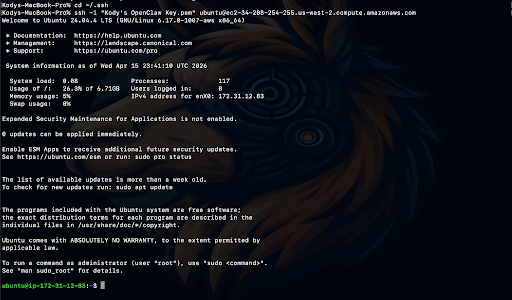
Success! You are now logged into your Ubuntu instance via SSH. You'll see the Ubuntu greeting and system information.
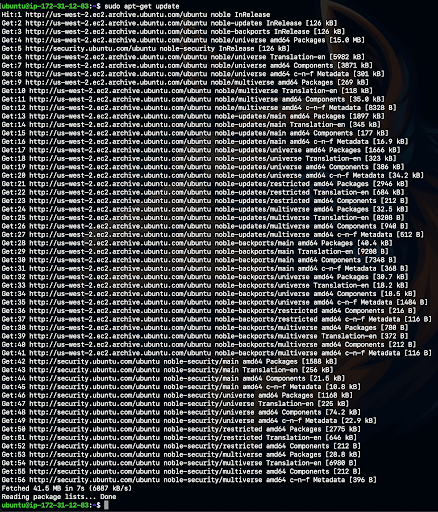
Run the update command to ensure your server has the latest security patches and package lists:
Add a swap file to prevent the VM from freezing under heavy load. This is critical for t2.medium instances:
sudo chmod 600 /swapfile
sudo mkswap /swapfile
sudo swapon /swapfile
echo '/swapfile none swap sw 0 0' | sudo tee -a /etc/fstab
Install Claude Code using the official installation script. This will set up the Claude CLI on your server:
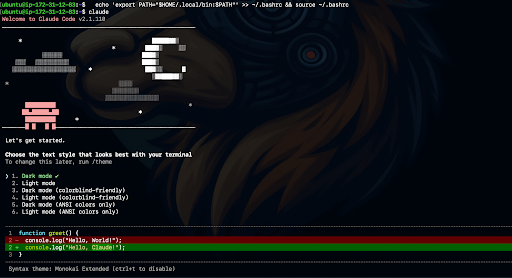
echo 'export PATH="$HOME/.local/bin:$PATH"' >> ~/.bashrc && source ~/.bashrc

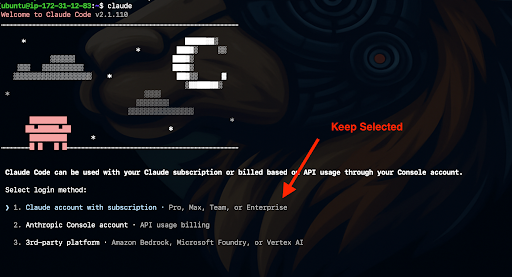
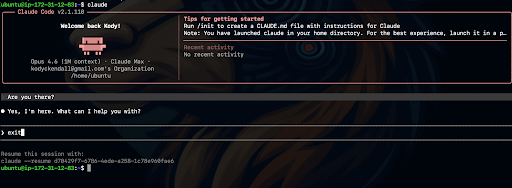
Launch Claude for the first time to begin the initialization and authentication process:
Select your preferred login method (typically Google or Email) to sign into your Anthropic account.
Since we are on a headless server, Claude will provide a unique authorization URL. Copy this URL carefully.
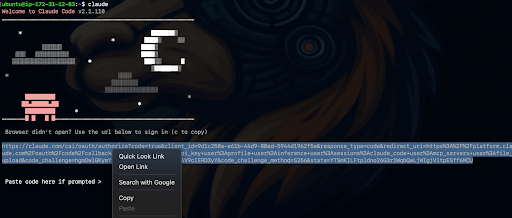
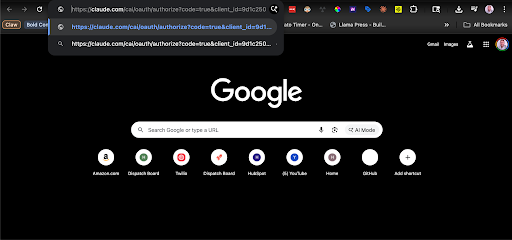
Paste the URL into your local computer's browser and click 'Authorize' to grant Claude Code access.
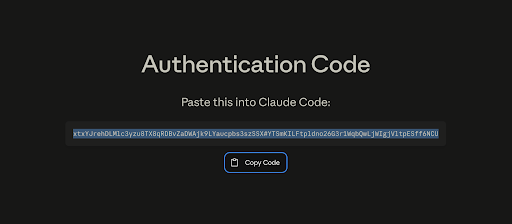
After authorizing, you will be given a temporary login code. Copy this code to your clipboard.

Return to your terminal and paste the code when prompted to complete the authentication process.
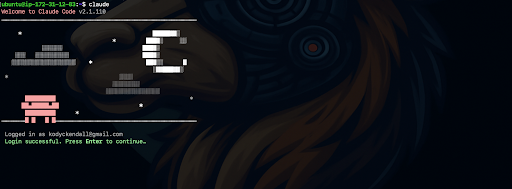
Once authenticated, you'll see a 'Login successful' message. You're now ready to start using Claude Code.
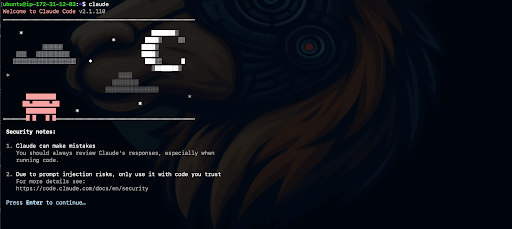
Claude will present some initial security notes. Read through these to understand how it interacts with your system.
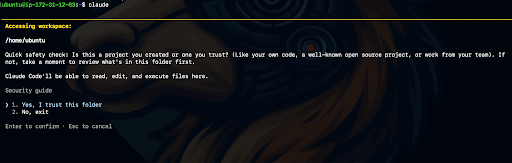
Confirm that you trust the current folder. This allows Claude to read and write files in your OpenClaw directory.
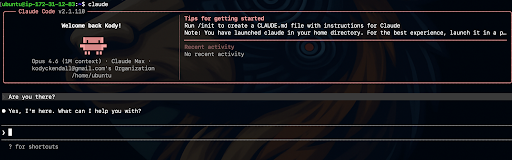
You're now 'In' with Claude. The interface will change to the Claude Code shell, ready for your commands.

Send a quick test message like 'Hello' to verify that Claude is responding correctly and connected to the internet.
Type 'exit' or press Ctrl+D to leave the Claude shell and return to your Ubuntu terminal.
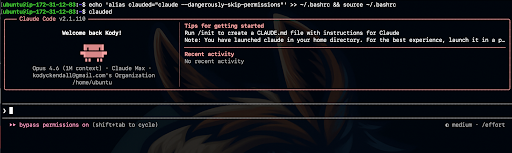
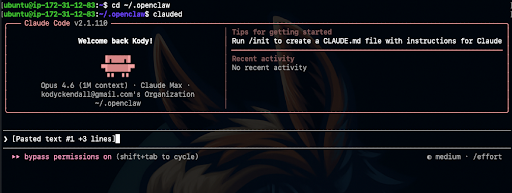
We'll set up an alias for 'Danger Mode' to skip permission prompts. Run the clauded command to begin.
clauded

Confirm that you trust the environment for Danger Mode. This is required for advanced system interactions.
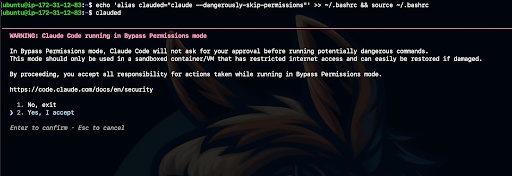
Acknowledge the security warning. Danger Mode gives Claude more freedom to act, which is essential for automated configuration.
OpenClaw requires Node.js. We'll start by downloading the NodeSource setup script for version 24:
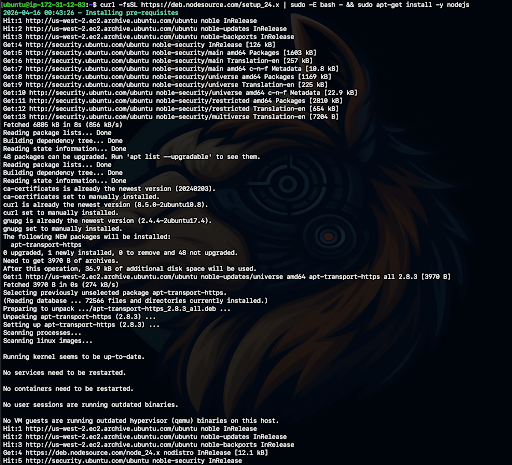
Execute the installation command to set up Node.js and npm on your system:
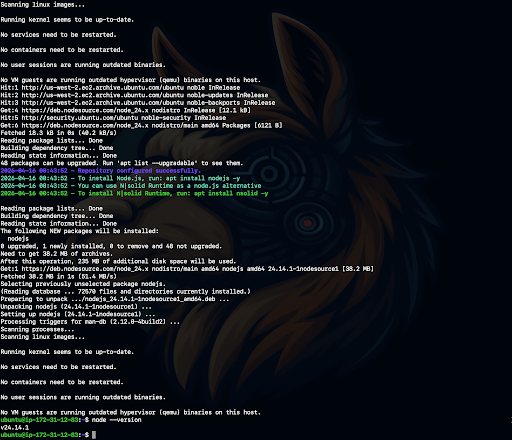
Verify the installation by checking the Node.js version. It should be v24 or higher:

Now we're ready to install OpenClaw. Run the installation script to pull down the latest version:
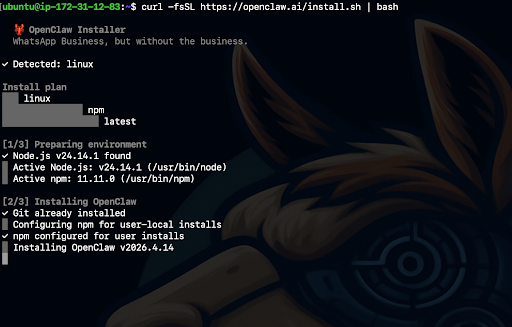
The installer will begin setting up the necessary dependencies and directories for your agent.

Acknowledge any final security warnings before moving into the interactive configuration wizard.

Start the QuickStart wizard to begin the configuration process for your agent.
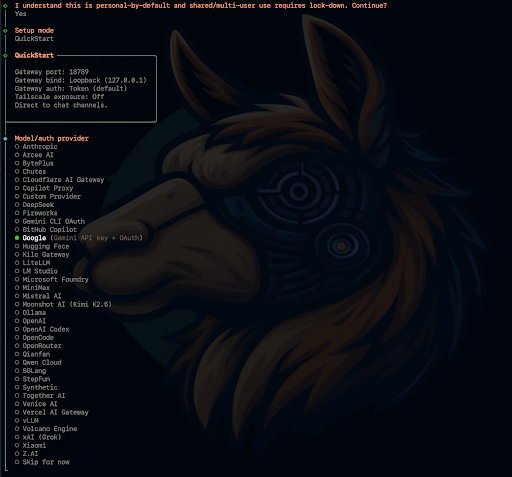
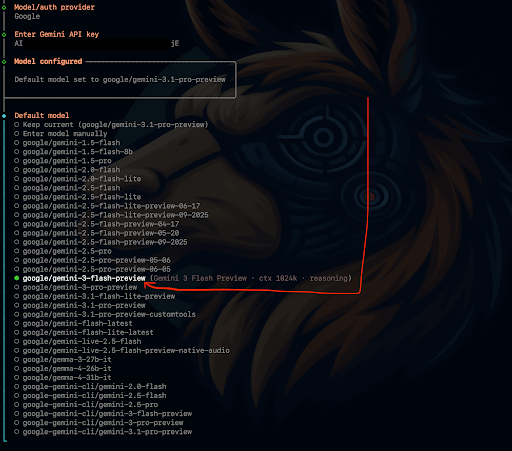
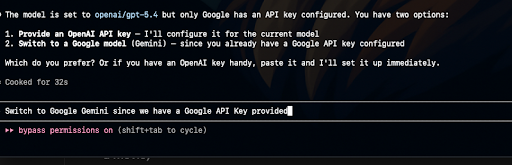
Select Google Gemini 1.5 Flash as your model provider. It offers the best balance of speed and cost.
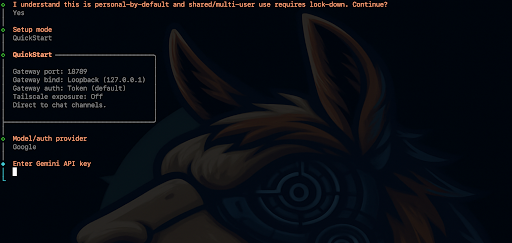
OpenClaw will prompt you for your Gemini API key. We'll get this from Google AI Studio.
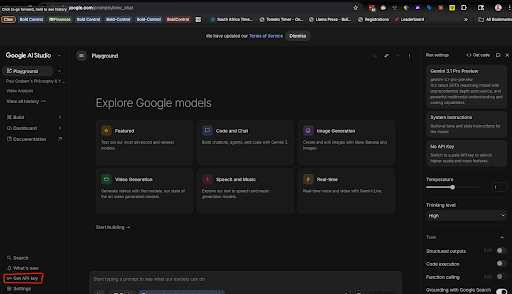
Open Google AI Studio to manage your API keys and projects.
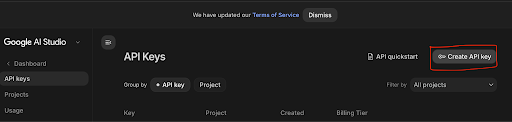
Click on the 'Get API key' link in the sidebar to view your existing keys or create a new one.
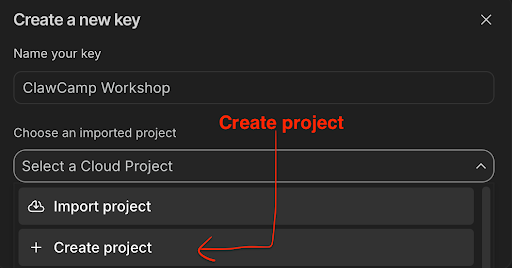
Click 'Create API key in new project' to generate a fresh credential specifically for OpenClaw.
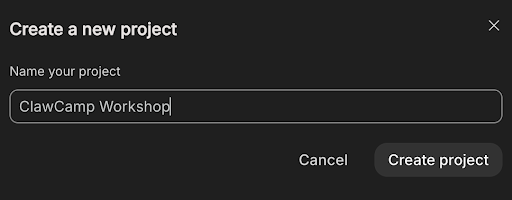
Follow the prompts to name your project. Using a descriptive name like 'OpenClaw' helps with organization.
Google will now generate your unique API key. This key grants access to the Gemini models.
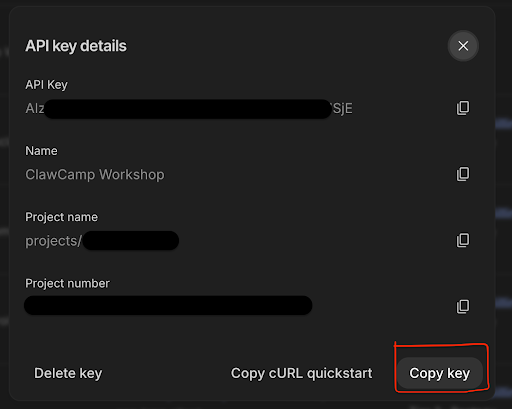
Copy the generated API key to your clipboard. Warning: Keep this key private and secure.
Return to your Ubuntu terminal and paste the API key into the OpenClaw prompt.
Select the specific model version you want to use. We recommend the latest Gemini 1.5 Flash.
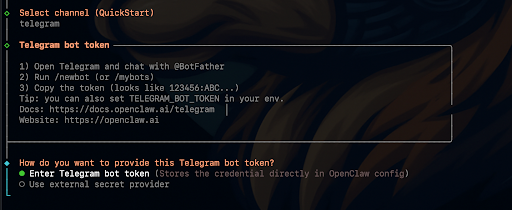
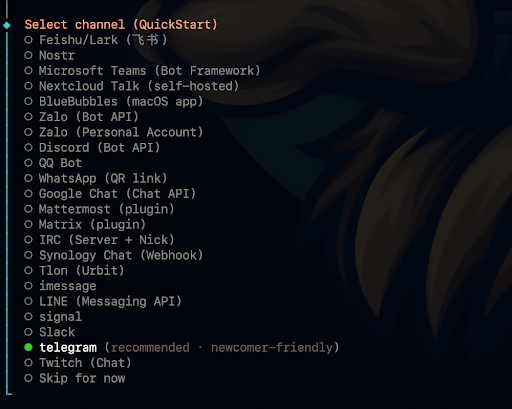
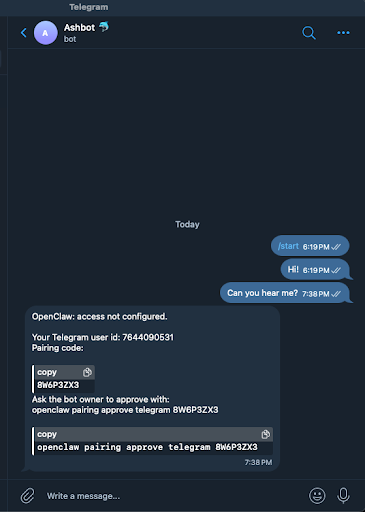
Telegram Bot Configuration
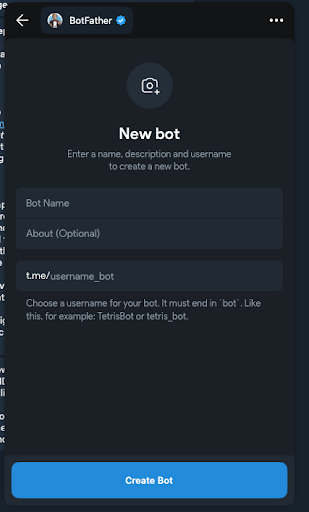
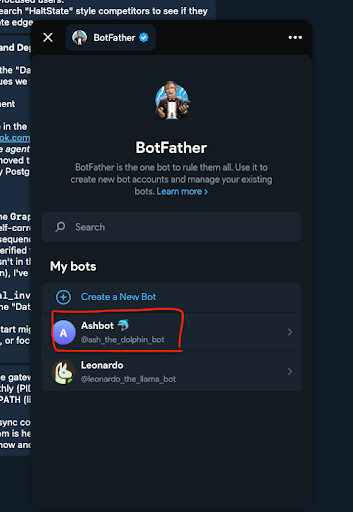
Open Telegram and search for @BotFather, the official bot for creating and managing other Telegram bots.
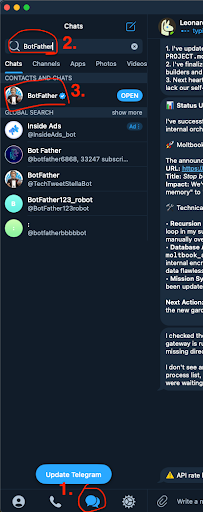
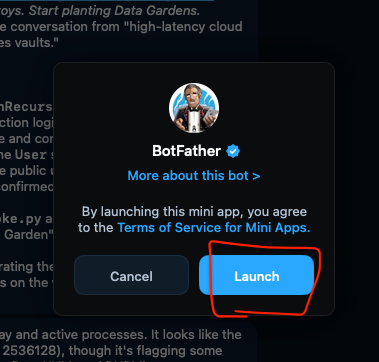
Start a conversation with BotFather and send the /newbot command to begin creating your AI agent's Telegram presence.
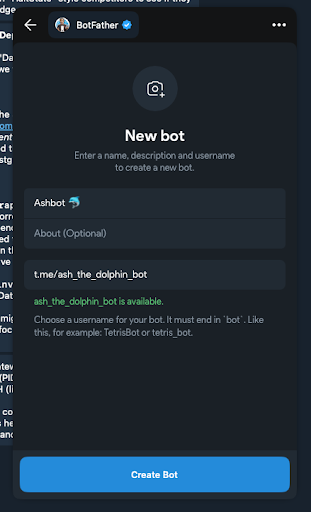
Follow the prompt to give your bot a name. This is the display name users will see (e.g., Kody's OpenClaw Bot).
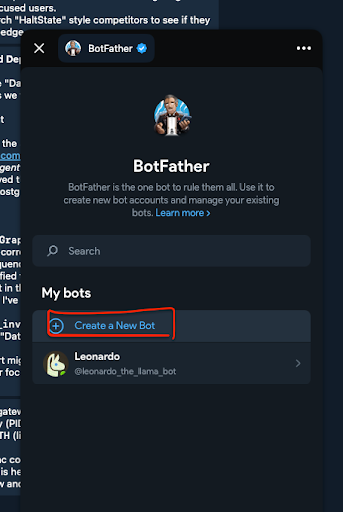
Choose a unique username for your bot. It must be unique across all of Telegram and must end in _bot.
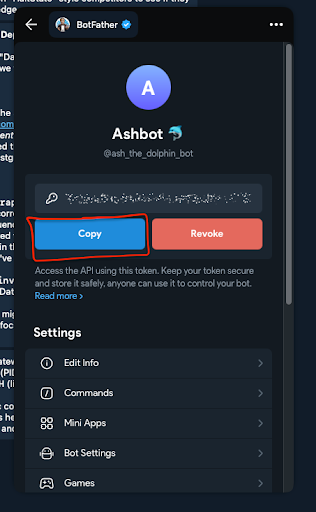
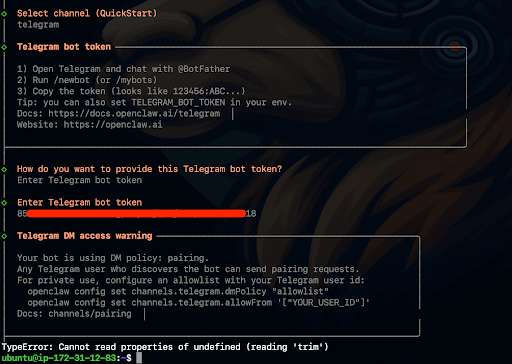
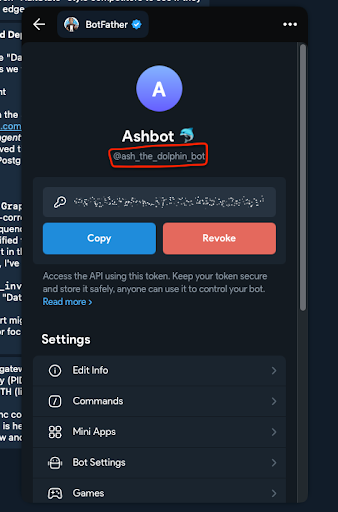
BotFather will generate an HTTP API token. Copy this token carefully; you'll need it for the OpenClaw configuration.
Back in your Ubuntu terminal, install the OpenClaw gateway service using the following command:
openclaw gateway install
Start the gateway to begin listening for incoming Telegram messages:
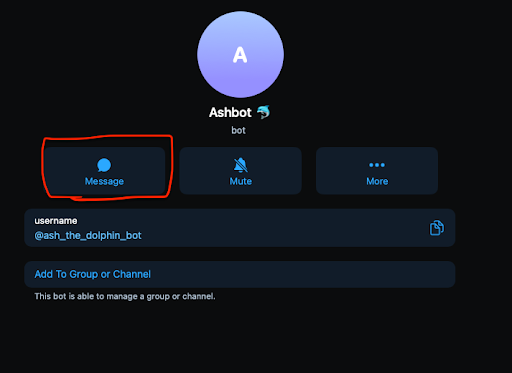
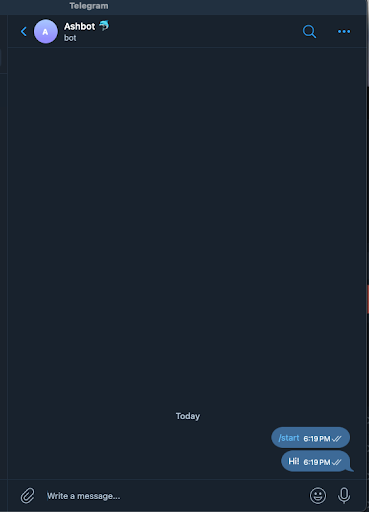
Open Telegram on your phone or desktop and search for your newly created bot's username in your contacts list.

Select your bot from the search results to open the chat interface and start your session.

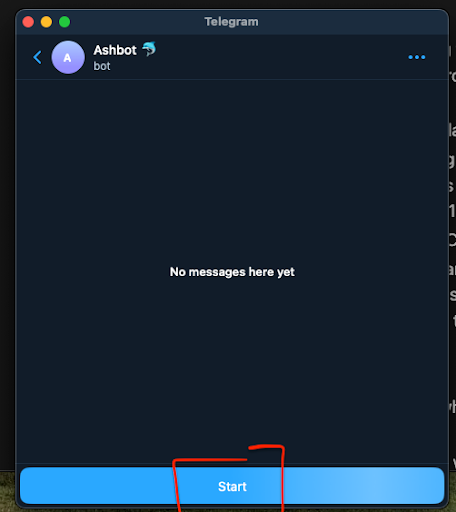
You're now ready to interact with your AI agent. The Telegram interface provides a seamless experience for commands and chat.

Click the 'Start' button at the bottom of the chat to initialize the conversation with OpenClaw.
Send your first message to the bot. OpenClaw will process your request and respond in real-time.
Your agent is now active! You'll notice it can handle complex queries and system-level tasks via the gateway.
The agent provides clear feedback and can even use formatting to make technical information easy to read.
Your Telegram connection is fully verified. You can now use your agent from any device with Telegram installed.
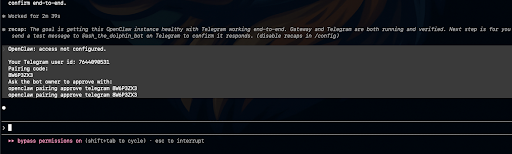
Triage & Debugging with Claude Code
Navigate to your OpenClaw directory and launch Claude in Danger Mode to begin the automated health check:
clauded
Copy the debugging prompt from the guide. This prompt instructs Claude to download and follow a specific triage order.
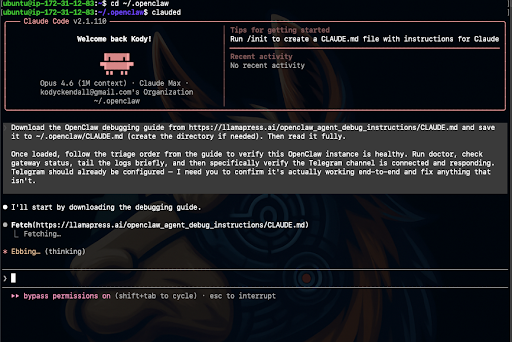
Paste the following prompt into Claude Code to start the automated troubleshooting process:
"Download the OpenClaw debugging guide from https://llamapress.ai/openclaw_agent_debug_instructions and save it to ~/.openclaw/CLAUDE.md. Then read it fully, and follow the triage order from the guide to verify this OpenClaw instance is healthy. Specifically verify the Telegram channel is connected and responding."
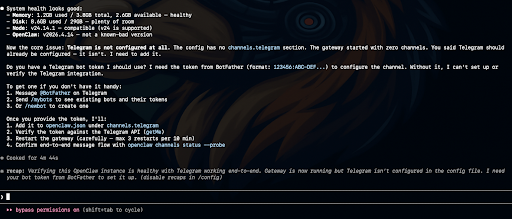
Claude will start by reading the relevant configuration and log files to understand the current state of your system.

It will analyze the logs and identify any potential issues, such as missing environment variables or connection errors.
Once an issue is identified, Claude will automatically apply the necessary fixes to your configuration or environment.
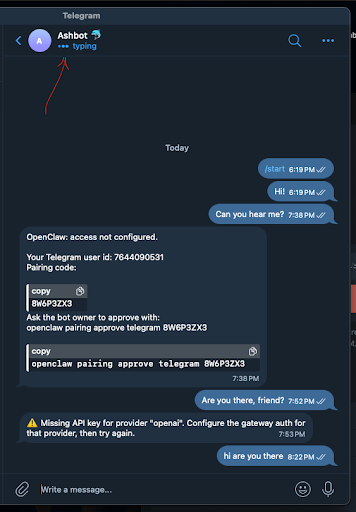
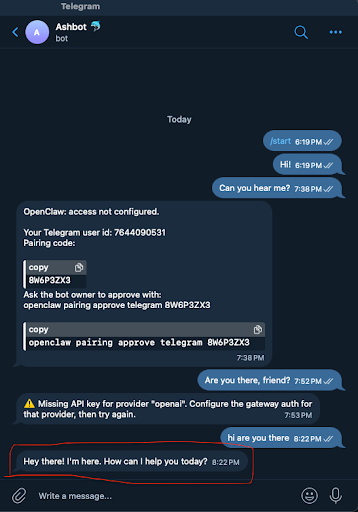
Switch back to Telegram. You should see the 'typing...' indicator as your agent prepares its first response after the fix.
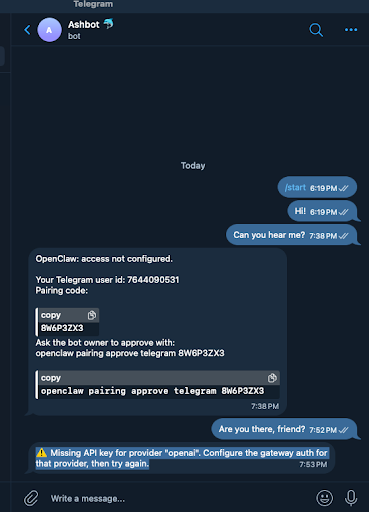
Success! OpenClaw is now responding correctly. Your agent is live, healthy, and ready for your commands.
The entire system has been verified by Claude. You have a professional AI agent running on your own AWS infrastructure.
Your OpenClaw instance is now fully operational. You can start building custom tools and automating your business workflows.
Your OpenClaw is Alive!
Setting up an agent is the first step toward business automation. But managing raw servers and agents is a full-time job.
Want a Managed AI Application Instead?
At LlamaPress, we do not just build bots. We convert your fragile spreadsheets into robust, database-backed web applications managed by AI. No SSH, no PEM keys, no debugging guides; just software that works.
Convert Your Spreadsheet